If you want to know how to use Solana DeFi, the three platforms you need to understand first are Jupiter, Raydium, and Orca. Together they handle the majority of all on-chain trading activity on Solana. Jupiter routes your swap across every available DEX to find the best price. Raydium runs the deepest liquidity pools on the network. Orca makes concentrated liquidity accessible for beginners and active liquidity providers alike. This guide explains how each one works, what it costs to use them, and how to get started from a freshly set up Phantom Wallet with no prior DeFi experience.
What Is Solana DeFi?
Solana DeFi refers to the collection of financial applications built on the Solana blockchain that let you trade, lend, borrow, and earn yield directly from your own wallet. No account creation. No company holding your funds. Every action runs through smart contracts on-chain, and you stay in control of your assets throughout.
The core building block of Solana DeFi is the decentralized exchange, or DEX. A DEX replaces the traditional order book run by a company with an automated market maker – a smart contract that holds two tokens in a liquidity pool and prices them automatically based on the ratio between them. When you swap tokens, you are trading against that pool rather than against another person.
Because Solana settles transactions in under a second and charges transaction fees of fractions of a cent, it has become one of the most active chains for on-chain trading. Solana’s TVL crossed $8 billion in 2025 and daily DEX volume regularly exceeds $3 billion. All of that activity runs through a handful of core protocols, the most important of which are Jupiter, Raydium, and Orca. These platforms use SPL tokens, which are the standard token format on Solana, comparable to ERC-20 tokens on Ethereum.
Because everything runs through smart contracts and stays in your wallet, this model is called self-custody. The non-custodial design means that neither the DEX nor anyone else can freeze or access your funds. To understand the underlying architecture that makes this possible, read our guide on how Solana smart contracts work.
Why Solana DeFi Stands Out
The main reason traders use Solana DeFi over other chains is cost and speed. A single swap costs roughly $0.001 in transaction fees. On Ethereum, the same trade can cost anywhere from a few dollars to tens of dollars depending on network congestion. On Solana, transactions confirm in under a second, which makes it practical to do multiple trades, adjust positions, and experiment without worrying about fees eating into returns.

Solana’s TVL and daily DEX volume surpassed Ethereum on multiple occasions in 2025, making it the most active blockchain for on-chain trading by volume. The depth of liquidity available across Jupiter, Raydium, and Orca means you can execute trades with minimal slippage on major pairs and still find markets for newer tokens that have not yet listed on centralized exchanges.
The non-custodial model also means you are trading without creating an account or submitting identification. Connect a DEX to your wallet, confirm the transaction in the wallet popup, and the swap settles in seconds.
The low-fee environment comes directly from how Solana processes transactions. Our guide on Solana transaction fees explains the fee structure and how priority fees work when the network is congested.
What Wallet Do You Need for Solana DeFi?
Phantom Wallet is the most widely used wallet for Solana DeFi and the one most beginners start with. It is available as a browser extension for Chrome, Firefox, Brave, and Edge, and as a mobile app for iOS and Android. The interface is clean, it connects to every major Solana DEX, and it displays your token balances, NFTs, and staking positions in one place.
Solflare is a strong alternative, especially for users who want more detailed staking controls or prefer a Solana-only wallet. Both are fully non-custodial, which means your private keys stay on your device and nowhere else.
To use any Solana DeFi platform, you need a small amount of SOL in your wallet to pay transaction fees. Keep at least 0.05 SOL separate from any amount you plan to trade or stake. Running out of SOL mid-session means you cannot approve transactions, withdraw funds, or move tokens.
When you first set up either wallet, write down your recovery phrase on paper and store it offline. This is the only way to restore your wallet if you lose access to your device. Anyone who has this phrase has full access to your funds.
The self-custody model means no password reset, no support ticket, and no company that can reverse a transaction for you. You are in full control, which also means full responsibility.
What Is Jupiter and How Does It Work?
Jupiter is the leading DEX aggregator on Solana, processing the majority of all swap volume on the network. Rather than running its own liquidity pools, Jupiter scans every major DEX on Solana, including Raydium, Orca, Meteora, Lifinity, and dozens of others, and finds the best available price for your trade. It then executes the swap in a single transaction, sometimes splitting the order across multiple pools to get you a better rate than any single source could offer.

Think of Jupiter as a flight comparison site for token swaps. Instead of checking each exchange manually, Jupiter does all the routing automatically and returns the best available execution. For most users on Solana, Jupiter is the right starting point for any swap.
Jupiter charges zero platform fees on standard swaps. You pay only the fee charged by the underlying DEX pool, typically 0.25% to 0.3%, plus the Solana network fee of roughly $0.001. The JUP token is Jupiter’s governance token and one of the most widely held tokens on Solana, with periodic airdrops distributed to active users.
Beyond basic swaps, Jupiter also supports limit orders, DCA, and perpetual futures, making it a full trading platform rather than just a routing tool.
To understand the network that processes every Jupiter transaction, our overview of how Solana works covers the validator and consensus structure that keeps finality under a second.
How to Swap Tokens on Jupiter
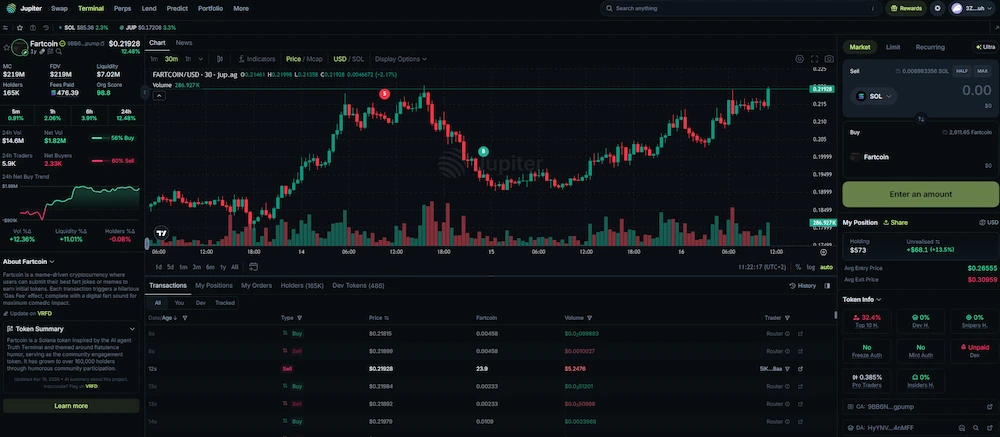
Go to jup.ag and click Connect Wallet in the top right corner. Select Phantom or Solflare from the list. Once connected, the swap interface loads automatically.
In the top field, select the token you want to sell. In the bottom field, select the token you want to receive. Enter the amount. Jupiter instantly calculates the best available route and shows you the expected output, the route it will take, and the estimated price impact.
Before confirming, check the slippage tolerance setting. The default is usually 0.5%, which works fine for major pairs like SOL and USDC. For low-liquidity tokens or memecoins, you may need to increase it to 1% or higher, but a higher setting means you accept a worse rate if the price moves before your transaction confirms. Click Swap and approve the transaction in your wallet popup. The swap settles in under a second.
Always keep at least 0.05 SOL in your wallet to cover the transaction fee. If the price impact warning shows above 1%, consider splitting the trade into smaller amounts or waiting for more liquidity to build in the pool.
How to Use Jupiter Limit Orders
A limit order on Jupiter lets you set a target price and walk away. The order sits in an on-chain escrow contract and executes automatically when the market hits your price. Your funds are held in that escrow, not by Jupiter, so they remain safe even if the website goes down.
Switch to the Limit tab in the Jupiter interface. Select your tokens, enter the amount, and set the price at which you want the order to fill. Jupiter supports both take-profit orders and stop-loss orders from the same interface. The taker fee of 0.2% applies when the order executes. There is no fee while the order is waiting.
How to Use Jupiter DCA
DCA, which stands for dollar cost averaging, is one of Jupiter’s most useful features for anyone who wants to build a position over time rather than buying all at once. Instead of trying to time the entry price, you set a total budget, a token pair, a frequency, and a duration. Jupiter then executes recurring buys on your schedule automatically.
This is particularly useful for managing entry into volatile assets. Spreading purchases over days or weeks smooths out the impact of short-term price volatility. Set the timeframe, confirm the first transaction, and Jupiter handles the rest until the budget is spent or you cancel.
Jupiter Fees Explained
Jupiter charges zero platform fees on standard token swaps. You pay whatever fee the underlying pool charges, typically 0.25% to 0.3% on Raydium standard pools, or 0.01% to 1% on CLMM pools depending on the tier. The Solana network fee adds roughly $0.001 per transaction regardless of trade size. The limit order fee is 0.2% on the filled amount and applies only when the order executes, not while it waits.
What Is Raydium and How Does It Work?
Raydium is the largest AMM on Solana by total value locked and the primary settlement venue for the majority of on-chain trades. Even when you swap through Jupiter, a significant share of those trades route through Raydium pools behind the scenes. Raydium was one of the first DEXs built on Solana, launching in early 2021, and has remained the dominant liquidity layer ever since.
Raydium runs two main types of liquidity pools. Standard AMM pools spread liquidity across the entire price range, which is simple to use but less capital-efficient. Concentrated liquidity pools, known as CLMM pools, let liquidity providers focus their capital within specific price ranges where most trading actually happens, which means the same amount of capital earns more fees per day. This model follows the same approach as Uniswap v3 on Ethereum.
Raydium is also where most tokens launched on Pump.fun migrate once they complete their bonding curve. This makes Raydium the first and often deepest source of liquidity for new tokens and memecoins on Solana. The RAY token is Raydium’s governance token and is used for fee buybacks and liquidity incentives.
The TVL on Raydium consistently ranks it among the top five DEXs across all blockchains, sometimes surpassing Uniswap in daily trading volume despite a fraction of Uniswap’s market cap.
Understanding the virtual machine that processes Raydium’s smart contracts helps when thinking about execution risk. Our guide on the Solana Virtual Machine explains how programs are deployed and run on-chain.
How to Swap Tokens on Raydium
Go to raydium.io and click Connect Wallet. Select your wallet and approve the connection. The swap interface opens on the main page.
Choose the token you want to sell in the top field and the token you want to receive in the bottom field. Raydium automatically routes your trade through its best available pool. Before confirming, check the slippage tolerance setting. The default of 0.5% is appropriate for major pairs. For low-liquidity tokens, raise it to 1% to 5%, but be aware that higher slippage settings expose you to worse execution.
Watch the price impact figure. If it is above 1%, the pool does not have enough liquidity for your trade size. Either split the trade, reduce the amount, or use Jupiter to route across multiple pools instead. During periods of high network activity, increase the priority fee to Turbo mode to reduce the chance of your transaction timing out.
Bookmark raydium.io directly. Phishing sites that mimic Raydium’s interface exist and can drain your wallet when you approve a transaction.
How to Provide Liquidity on Raydium
Providing liquidity to Raydium means depositing two tokens into a pool in equal value. In return, you receive LP tokens that represent your share of the pool. Every time someone trades through that pool, you earn a portion of the trading fee. On standard pools, the fee is 0.25% per trade, with 0.22% going to liquidity providers and 0.03% to protocol buybacks.
On CLMM pools, you choose a price range where your capital will be active. When the price trades within that range, your position earns fees. When the price moves outside it, your position goes out of range and earns nothing until price returns. This is the trade-off of concentrated liquidity: higher potential returns per dollar deployed, but it requires active monitoring.
Before adding funds to any AMM pool, understand impermanent loss. When the price of one token in a pair moves significantly relative to the other, the value of your LP position can end up lower than simply holding the tokens outright. In volatile pairs, particularly memecoin pools, this loss can be severe. Impermanent loss is not permanent if the price returns to your entry ratio, but in practice, many tokens do not.
The yield farming feature on Raydium lets you stake your LP tokens in reward farms to earn additional RAY token incentives on top of the base trading fees. This increases your effective yield but adds another layer of smart contract exposure.
As a liquidity provider you collect the fees passively, but the overall return depends on trading volume through the pool, your chosen price range (for CLMM), and whether impermanent loss eats into the fee income. Start with small amounts in stable pairs like SOL/USDC before experimenting with more volatile pools.
Raydium Strengths and Limitations
Raydium’s main strength is deepest liquidity on Solana. With the highest TVL of any Solana DEX and direct integration with tokens migrating from Pump.fun, it is where the most volume settles. LP incentives and farm rewards give liquidity providers a way to earn additional yield beyond base fees.
The limitations are real. Standard pools are capital-inefficient. CLMM positions require active management to stay in range. New token pools carry significant impermanent loss risk. And as with any DeFi protocol, smart contract risk exists. In December 2022, Raydium suffered an exploit due to a compromised private key. The team compensated affected LPs and improved security, but the incident is worth knowing about before depositing large sums.
What Is Orca and How Does It Work?
Orca is a concentrated liquidity DEX on Solana built around its Whirlpool pool system. It is widely considered the most beginner-friendly Solana DEX, with a clean interface and clear pricing that makes executing a first swap straightforward. Orca is the second-largest AMM on Solana by TVL and one of the primary liquidity sources that Jupiter routes through, particularly for major pairs like SOL/USDC.

Orca’s Whirlpools are its version of concentrated liquidity pools. They work on the same principle as Raydium’s CLMM pools: liquidity providers choose a price range and earn fees only when the price trades within it. The capital efficiency of this model means that the same dollar amount of liquidity can support 10 to 100 times more trading volume than a traditional constant-product pool.
Pool creators on Orca can choose from multiple fee tiers, typically 0.01%, 0.05%, 0.3%, and 1%, depending on how volatile the token pair is. Stable pairs like USDC/USDT use the lowest tier. Volatile pairs use higher tiers to compensate LPs for the greater risk of price movement. The ORCA token is the protocol’s governance token and is used in fee distribution decisions.
Orca hosts some of the deepest pools for major SOL/USDC and stablecoin pairs on Solana, making it a consistent source of tight spreads for trades Jupiter routes through these pools.
How to Swap Tokens on Orca
Go to orca.so and click Connect Wallet. Select Phantom or Solflare. The swap interface opens immediately with a simple two-field layout.
Select the token you want to sell in the top field and the token you want to receive in the bottom. Orca’s Fair Price Indicator shows whether the quoted price is within 1% of the broader market. If it flags a warning, the pool has too little liquidity for your trade size. Reduce the amount or switch to Jupiter, which may route through a more liquid source.
Adjust slippage tolerance if needed and click Swap. Approve the transaction in your wallet. The interface is deliberately minimal, which makes it one of the easiest entry points into Solana DeFi for users who have never used a DEX before.
How to Provide Liquidity on Orca Whirlpools
Go to orca.so, switch to the Pools tab, and find a pair you want to provide liquidity for. Click the pool and then Add Liquidity.
You will be asked to choose a price range. This is the range within which your capital is active and earning fees. A narrow price range around the current price earns higher fees per dollar when price stays inside it, but goes out of range quickly if the price moves. A wider range earns less per dollar but stays active longer without needing adjustment.
Orca shows an estimated APY for each pool based on recent trading volume. This number is a projection, not a guarantee, and can change significantly as volume and liquidity shift. When your position goes out of range, it stops earning fees entirely until the price returns or you adjust your range.
Impermanent loss applies to Orca Whirlpools just as it does to Raydium pools. The more volatile the pair, the greater the potential for your LP position to underperform simply holding the tokens. The higher fee tier on volatile pairs partially compensates for this, but does not eliminate the risk.
Orca’s Liquidity Terminal provides analytics on active positions, fee accumulation, and range status, making it easier to monitor multiple concentrated liquidity positions without going off-platform. As an LP, reviewing your positions at least once a day in volatile market conditions is a reasonable minimum.
Orca Strengths and Limitations
Orca’s strengths are its clean interface, deep pools for blue-chip tokens like SOL/USDC, and the capital efficiency of its Whirlpool system. For LPs who actively manage their positions, the potential returns are higher than on traditional AMMs. The audit track record is solid, with multiple security reviews completed by Neodyme and an active Immunefi bug bounty program.
The limitations matter. Whirlpools require active management. A set-and-forget approach with concentrated liquidity often results in positions going out of range and earning nothing while the price moves away. Orca also has a smaller pool selection for newer or long-tail tokens compared to Raydium, which means it is not the right venue for trading freshly launched memecoins.
Jupiter vs Raydium vs Orca: Which One Should You Use?
Most experienced Solana users use all three.
Jupiter handles swaps. Raydium handles memecoin liquidity and farming. Orca handles concentrated liquidity on stable and blue-chip pairs. They are complementary tools, not competing alternatives. Here is how they break down by feature:
| Feature | Jupiter | Raydium | Orca |
|---|---|---|---|
| Type | DEX aggregator | AMM + CLMM | Concentrated liquidity AMM |
| Own liquidity pools | No | Yes | Yes |
| Swap fee | 0% platform fee | 0.25% standard / 0.01-1% CLMM | 0.01%-1% by tier |
| Provide liquidity | No | Yes | Yes |
| Yield farming | No | Yes | Limited |
| DCA | Yes | No | No |
| Limit orders | Yes | Yes | No |
| New token launches | No | Yes (Pump.fun migrations) | No |
| Best for | Best-price swaps | LPs, new tokens, farming | Capital-efficient LPs |
- Use Jupiter if you want the best price on any swap, you want DCA or limit order tools, or you are new to Solana DeFi and want one interface to start with. Jupiter should be your default for any token swap.
- Use Raydium if you want to provide liquidity to high-volume memecoin pools, earn RAY farming rewards, or trade a token that has just launched and only has liquidity on Raydium directly.
- Use Orca if you want to provide concentrated liquidity to major pairs like SOL/USDC, prefer a cleaner interface for swaps, or want to actively manage a capital-efficient LP position on stable or blue-chip pairs.
When you swap on Jupiter, it often routes through both Raydium and Orca pools behind the scenes. Choosing Jupiter for swaps does not mean avoiding the other two. It means letting the routing algorithm decide which source gives you the best execution for each individual trade.
How to Get Started With Solana DeFi
Getting started with Solana DeFi requires four steps: setting up a wallet, adding SOL, connecting to a DEX, and executing a first swap. The whole process takes less than 15 minutes. Once you have completed it, how to use Solana DeFi becomes a question of which platform to use for which purpose rather than how to get access.
Step 1: Set Up a Solana Wallet
Download Phantom Wallet from phantom.com or your browser’s official extension store. Alternatively, download Solflare from solflare.com. Both are free and take under five minutes to set up.
Create a new wallet, write down your recovery phrase on paper, and store it somewhere safe and offline. This phrase is the only backup for your wallet. The wallet is fully non-custodial, which means no company holds your funds or can restore access if you lose the phrase.
Step 2: Fund Your Wallet With SOL
You need SOL in your wallet before you can use any Solana DeFi platform. There are two ways to get it. The simplest is to buy SOL on a centralized exchange and withdraw it to your wallet address. Our guide on how to buy Solana walks through the full purchase process. The second option is to use a fiat on-ramp like MoonPay, which is built into Phantom and lets you buy SOL directly with a card.
Keep at least 0.05 SOL separate from any trading budget to cover ongoing transaction fees. On Solana, fees are tiny, but you still need SOL in the wallet to approve any transaction.
Step 3: Connect Your Wallet to a DEX
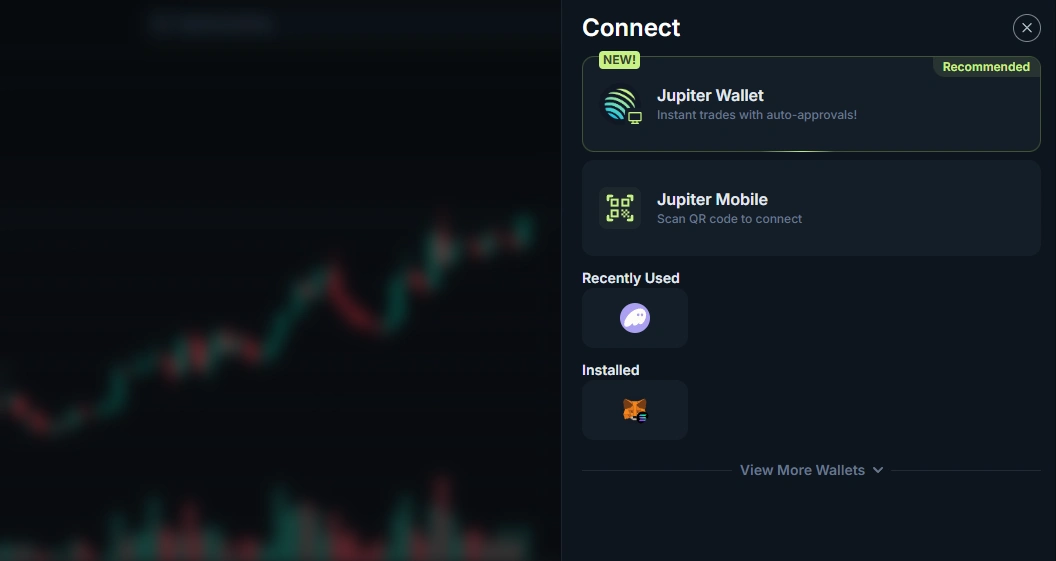
Go to jup.ag, raydium.io, or orca.so. Each site has a Connect Wallet button in the top right corner. Click it, select your wallet from the list, and approve the connection in the wallet popup. Connecting your wallet to a DEX only gives the site permission to read your address and request transaction approvals. It does not give the site access to your funds.
Bookmark the official URLs for Jupiter, Raydium, and Orca. Phishing sites designed to look identical to these platforms are common. A fake site can drain your wallet the moment you approve a transaction. Always check the URL before connecting.
Step 4: Execute Your First Swap
Jupiter at jup.ag is the right starting point. Select SOL in the top field and USDC in the bottom field as a low-risk first trade. Enter a small amount to learn the interface before committing larger sums.
Review the price impact figure. If it is below 0.1%, the pool has plenty of liquidity and your trade will fill close to the displayed price. Check the slippage setting, leave it at the default for stable pairs, and click Swap. Approve in your wallet. The transaction confirms in under a second and your SOL balance updates immediately.
Once you are comfortable with basic swap tokens functionality on Jupiter, you can explore limit orders, DCA, and providing liquidity on Raydium or Orca at your own pace.
Solana DeFi Security: How to Stay Safe
The biggest risks in Solana DeFi are not usually the protocols themselves. Raydium, Jupiter, and Orca are all audited, established platforms with years of operation. The risks that affect most users are human errors: connecting to the wrong site, approving a malicious transaction, or buying a token designed to steal funds.
- Phishing sites: Fake versions of Jupiter, Raydium, and Orca exist and are regularly promoted through search ads and social media. Always verify the URL before connecting your wallet. Bookmark the real sites so you are not relying on search results each time.
- Smart contract risk: Every DeFi protocol carries the risk of a bug or exploit in its smart contract code. Use only audited protocols, check audit reports when available, and never deposit more than you can afford to lose in any single protocol.
- Rug pulls and scam tokens: Any wallet can create a token on Solana and add liquidity to a Raydium pool. Before buying any unfamiliar token, check its contract on RugCheck or DexScreener. Look at the liquidity depth, the percentage of supply held by the top wallets, and whether liquidity has been locked. A token where 90% of supply sits in one wallet and liquidity is unlocked is a setup for a rug pull.
- Revoke approvals: When you interact with a DeFi protocol, you sometimes grant it spending permissions on specific tokens. Use Solscan’s token approval checker periodically to see which contracts have approvals on your wallet. Revoke approvals for any protocol you no longer use. Old, unused approvals are a risk if that protocol is ever compromised.
- Impermanent loss: If you provide liquidity, understand that the value of your LP position can drop below what you would have had by simply holding the tokens. This is not fraud or an exploit. It is a mathematical property of AMM pools. Go into it knowing the downside.
- Phishing through airdrops: Random tokens appearing in your wallet are often scam airdrops designed to get you to click a link or connect to a malicious site. Do not interact with tokens you did not buy.
The non-custodial design of Solana DeFi means you carry full responsibility for every approval you sign. A transaction cannot be reversed once it confirms. Read what each approval says before you click confirm.
To understand what SOL is and why it plays the central role it does across all these protocols, our guide on what SOL is covers the token’s function within the network.
Solana DeFi FAQs
What Is the Difference Between Jupiter and Raydium?
Jupiter is a DEX aggregator that has no liquidity pools of its own. It scans every DEX on Solana and routes your trade through whichever source gives the best price. Raydium is an AMM that runs its own pools and holds actual liquidity. When you swap on Jupiter, it often routes through Raydium pools. If you want the best swap price, use Jupiter. If you want to provide liquidity and earn trading fees, go directly to Raydium.
Which Solana DEX Is Best for Beginners?
For swaps, Jupiter is the best starting point because it finds the best price automatically with zero extra fees. For beginners who want to provide liquidity for the first time, Orca is the more user-friendly option because its interface is clean and its Fair Price Indicator flags bad trades before you confirm. Both platforms let you swap tokens easily without any prior DeFi experience.
What Are Orca Whirlpools?
Orca Whirlpools are Orca’s concentrated liquidity pools. Instead of spreading liquidity across all possible prices, LPs choose a specific price range where their capital is active. This makes each dollar of liquidity far more efficient because it is focused where actual trading happens. When the price trades within your range, you earn fees. When it moves outside, your position earns nothing until you adjust the range or price returns.
Can I Provide Liquidity on Jupiter?
No. Jupiter does not run its own liquidity pools and does not support direct liquidity provision. It is a pure swap aggregator. To provide liquidity and earn trading fees, use Raydium or Orca directly. Jupiter routes trades through those platforms but does not replicate their LP functionality.
How Do I Avoid Slippage on Solana?
Slippage happens when a trade moves the price because the pool does not have enough liquidity to absorb the order size. To minimize slippage, use Jupiter for swaps since it splits large trades across multiple pools to reduce price impact. Before trading, check the price impact figure in the swap interface. If it is above 1%, reduce your trade size. Avoid swapping large amounts into thin pools with low TVL. On stable pairs, slippage is usually well below 0.1% regardless of trade size.
What Is Impermanent Loss?
Impermanent loss is the difference in value between holding two tokens outright versus depositing them into an AMM liquidity pool as an LP. When the price of one token in the pair changes relative to the other, the AMM rebalances automatically, which means you end up with more of the token that lost value and less of the one that gained. The loss is called impermanent because it reverses if the price ratio returns to what it was when you entered. In practice, for volatile pairs, price rarely returns exactly to the entry ratio. Trading fee income partially offsets this, but does not always cover it fully. Always check an impermanent loss calculator before providing liquidity to any volatile pair.
Is Solana DeFi Safe?
The established protocols in Solana DeFi – Jupiter, Raydium, and Orca – are audited and have processed billions in cumulative volume. None of them holds your funds at any point. The risk in these platforms is smart contract risk, meaning a bug in the code could theoretically be exploited. The bigger practical risk for most users is phishing: fake sites, malicious airdrops, and scam tokens that look legitimate. Verifying URLs, using RugCheck before buying unknown tokens, and revoking unused approvals are the most effective habits for staying safe.
Wrapping Up
Getting started with Solana DeFi is faster and cheaper than on any other major blockchain. Set up Phantom, buy some SOL, and your first swap on Jupiter takes under a minute from a standing start. From there, how to use Solana DeFi expands in whatever direction you want: earning fees as an LP on Orca Whirlpools, farming rewards on Raydium, or building a position over time with Jupiter’s DCA tool.
Start with small amounts on each platform before committing real capital. The fees are low enough that testing with $10 to $20 teaches you everything you need to know about how each interface works and what the transaction approval flow looks like in your wallet. If you need to move SOL between wallets or to an exchange, our guide on how to transfer Solana covers the withdrawal and transfer process in full.